e+ Ticketing Guide (with Love Live! event ticket info)
A guide to event tickets on the Japan version of e+, including both general advice and specific information for Love Live! events.
- Last updated: 2026-03-30
- Originally published: 2022-10-03
Introduction
I'll explain what you'll need to do to apply for event tickets on the Japan version of e+, a ticketing website, primarily from the perspective of someone who's neither a resident nor citizen of Japan.
Most major Love Live! events in Japan distribute tickets through e+, usually through at least one ticket lottery. This guide is also applicable to most events that use the Japan version of e+ for their ticketing.
Other ticketing guides (including resources linked in the following text):
- A more general overview of ticketing for events in Japan, from my admittedly limited experience.
- Getting a Japanese phone number that can make voice calls and receive SMS.
- Paying for tickets on Japanese ticketing sites.
- Love Live! overseas ticket & hotel packages.
Step 1: Get a Japanese phone number
You need an e+ account, and in order to make an e+ account, you will need a Japanese phone number that can make calls. (VoIP numbers, e.g. those starting with 050, don't work.)
There are a few options for overseas residents—one of them, the Mobal Voice+Data 5G eSIM, should be possible to activate and use overseas. (You'll need to enable international roaming for an additional fee.)
See this page for more details.
Can I cancel the plan once I've registered for an account?
I don't recommend canceling the plan for several reasons:
- If the phone number is released to someone else and they sign up for a new account using that number, your account may become un-verified. This has actually caused problems for tickets on accounts where the number was used for a different account—the photo upload site did not allow the user to log in. (This was fixed by verifying with a new phone number and then communicating with e+ support staff.)
- Some tickets will require you to verify the phone number again—see the SumaChike section below. e+ records the phone number at the time of application, so changing the phone number on the account will not help you if you no longer have access to the number you applied with. (Again, you may be able to fix this by communicating with e+ support staff.)
- You may need to use some other ticketing website at some point, and several of these also require verifying a Japanese phone number.
Step 2: Register for an e+ account
Now you have a Japanese phone number that can call. Great!
Sign up for an account here: https://eplus.jp/touroku
- Your phone number should be in the format 0x0xxxxxxxx (11 digits). If your phone number starts with 81, remove it and add a 0 at the front. (The +81 is what you attach to call Japan phone numbers from overseas.)
- Google Translate should be enough to get through the forms.
- After you enter your email address, it'll send you an email with a link to continue the registration process.
- Be careful: you can't change your first name once registered, so make sure it's correct!
- It might make you input some info in full-width characters—Google "full width converter" and there will be some sites that can help.
- To verify your phone number, you'll need to call the number they show you (usually beginning with 050) within 120 seconds.
Step 3: Submit the ticket application
The specific process varies by the event, so refer to the event's page. Here's a list of the Love Live! events on this site. (Sometimes I get behind on updating these pages, so when in doubt, check the official event website.)
What should you select for the payment method?
Check Step 5. (Sorry, I just wanted things to be in the order that you do them...)
If you are applying for 2 or more tickets...
You will either win all the tickets in the application or none of them. For example: if you apply for 2 tickets, you will either win 2 tickets or 0 tickets; you cannot win only 1 ticket from such an application.
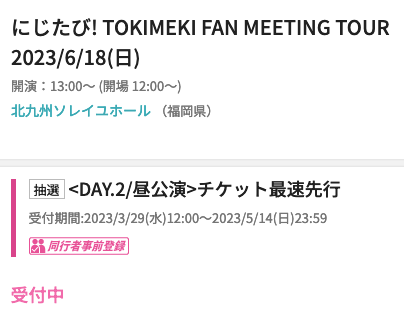
For Love Live! events, and many others, each ticket will require its own e+ account. If you see the symbol below on e+, the event will require you to register each ticket's owner at application time:

Register your partner(s) beforehand: https://member.eplus.jp/update-dokosha They will need to log in to confirm the registration before you can proceed.
When you submit a ticket application, you'll choose your partner for each ticket (besides the first one) near the end of the application process.
Warning: Do not mix partners within a lottery round. For example: Suppose A, B, and C want to enter a lottery. If A & B pair up, A & C or B & C should not pair up. (This is only within a single lottery round; it's fine to to change pairings in a later lottery round.)
If the event uses SumaChike (スマチケ) e-tickets...
You will need to fill out the application on a mobile browser or possibly the e+ app.
You can also use the developer tools in Chrome to simulate a mobile browser using Device Mode/Responsive Design Mode. You may have to also change the User Agent.
Step 4: Check the lottery results (if applicable)
e+ is always slow to send out emails (they can be delayed up to a few hours), so I recommend checking the website at the time that results are posted: https://eplus.jp/jyoukyou/
Step 5: Pay for the ticket(s)
As of March 2026, many foreign credit/debit cards have been reported to work for payment on e+, so I suggest trying your own card.
See this page for details on payments.
My recommendations if your card(s) don't work:
- If you can go to Japan during the payment period: Choose conbini (convenience store) payment and do the payment yourself. 7-11 usually accepts foreign credit cards. You can also use a virtual credit card, as in the next item.
- If you can go to Japan before the payment period, but have to leave before it: Make a virtual credit card (e.g. Vandle) and load money onto it at a conbini or ATM. Make sure you have enough money on it for all the tickets you plan to pay for. (Bonus: if you win, your card will be charged before the actual results announcement; at earliest, 1-2 days before.)
- If you will not be in Japan before the payment deadline: You must find someone in Japan to either do the payment at a conbini or load your virtual credit card.
It may take a day for the website to update after a conbini payment, so don't sweat too hard if it doesn't immediately say the payment has been completed.
Step 6: Get into the venue
You are now the owner of a ticket! Wonderful!
At this point, what you'll need to do depends on the type of ticket the event uses.
All of this is always subject to change, so it's not guaranteed that the system will be the same for future events.
e-ticket with face recognition
Most Love Live! events are currently using this for most, if not all, tickets, as of March 2026.
- 9 days before the event, you'll get an email that links to a page to register a photo of your face.
- On that page, you'll need to verify either your email address or phone number. (You only need to do this the first time you upload your face photo.)
- Once that's done, upload a photo of your face. You will have about a week to register the face photo.
- 2 days before the event at 16:00 (JST), you can access that same page to see your seat number.
- When you enter the venue, you'll walk up to a camera that takes a photo of your face, and if it matches the registered face, you'll be let into the venue. You won't need to show a ticket. (If it doesn't match, or if you submitted the same photo for multiple tickets for some reason, then you'll have to sort it out and probably show your passport to verify your name matches your account. Don't forget your passport/ID.)
- After you've been admitted, the ticket screen will change again to reflect this. In some rare circumstances, staff may ask to see this screen, so I recommend having internet access at the venue.
e-ticket on the e+ app (スマチケ/SumaChike)
Last-minute tickets to Love Live! events may be SumaChike (スマチケ) instead. Other events exclusively use these.
- Install the e+ mobile app. Depending on your phone's OS, the steps to do so will differ. It's only in the Japan version of each app store.
- Some days before the event, you'll get an email with a link to download the ticket. Open the email on your phone, and tap on the download link. This should open the e+ app and download the ticket.
- You may need to log in to download the ticket. (Some tickets don't require this.) It doesn't matter what account you use to log in; the name and phone number associated with the ticket are from the original account used to buy it.
- You may need to call to verify the phone number for one of the accounts associated with the ticket. (This is the case for SumaChike for most Love Live! events.) You enter the phone number, it gives you a phone number to call, and you call the number. If you only applied with one account, that's the one you have to enter. Otherwise, you can enter the phone number for any of the accounts. This phone number is the one you used at the time of application, so don't lose access to it! Even if you update your account's phone number afterwards, it will not change the phone number associated with the ticket.
- If you have multiple tickets, you'll need to send the others to each person that's using them. (Each of them will need the e+ app.) Press the blue button under the seat information that says "同行者へ分配する". It'll ask you to send the ticket link via either email or LINE. If you pick email, it may ask if you want to open your contacts—you can choose いいえ to say no. When your recipients download the ticket, it might require phone verification again.
- When entering the venue, tap the pink arrow-ish button on the top right that says "入場画面に進む". The staff should be able to help you from there.
Paper tickets
Some events use these.
You'll usually need to get them printed at a convenience store—usually you can do this a few days before the event, and can even do it right before the event if you want. This is done by either entering a number at a machine to get a slip you take the cashier (FamilyMart, Lawson) or showing a code to the cashier (7-11, FamilyMart QR codes).
In rare cases, you'll have to get tickets delivered to an address in Japan. You may be able to get them delivered to your hotel—ask them whether they can receive packages for you. Otherwise, you can use a forwarding service like Blackship that give you an address in Japan. Blackship lets you pick up items at their warehouse, so you can stop by when you arrive in Japan. Here's my referral link to Blackship if you'd like to use it—you'll get 5 USD off on fees.